
Dan Reams is a former podcaster (as are many) and health care technology professional based in The Triangle, a North Carolina tech hub. Originally from the Madison, Wisconsin area, Dan enjoys riding motorcycles, writing, craft beers, reading Science Fiction, having meaningful conversations, and above all else, thinking through processes and tweaking them, adding spice here, thickening sauce there. Mmmm. Processes.
Where is the Journal Log?
The journal was previously up top, but I realized readers likely care more about the bike than the chronicle of my ass upon it, so I’ve moved it toward the bottom of this post. Just click this Journal Log link to be whisked down this page to where the newest entries will be toward the top of that section.
Preface – Why This Bike For Me?
2020-06-26
Related: Tips for New or Returning Motorcyclists
I’m 13 months new to North Carolina, and prior to moving here, from SE Wisconsin, I sold my 2006 Yamaha Roadstar Silverado 1700. I’d had it for six wonderful years, but the riding I wanted to do, here in NC, is a different beastie. In Wisconsin I’d used my bike as both a commuter vehicle and for recreation, but the commute was roughly 50 miles, one way, much of it being on Interstate-94, or four-lane U.S. Highway 12, both roads demanding a cruiser. Weighing in at 740 lbs wet, it was more than enough to handle the cross-winds. It’s torque was enough to make 80 MPH feel like 50 MPH in one’s average car. On the weekends I’d ride around my local city, feeling the bike to be a bit cumbersome, a bit too big. When I’d ride the beautiful back highways, I’d have to be extra careful on the curves and twisties not to scrape my floor-boards on the asphalt.
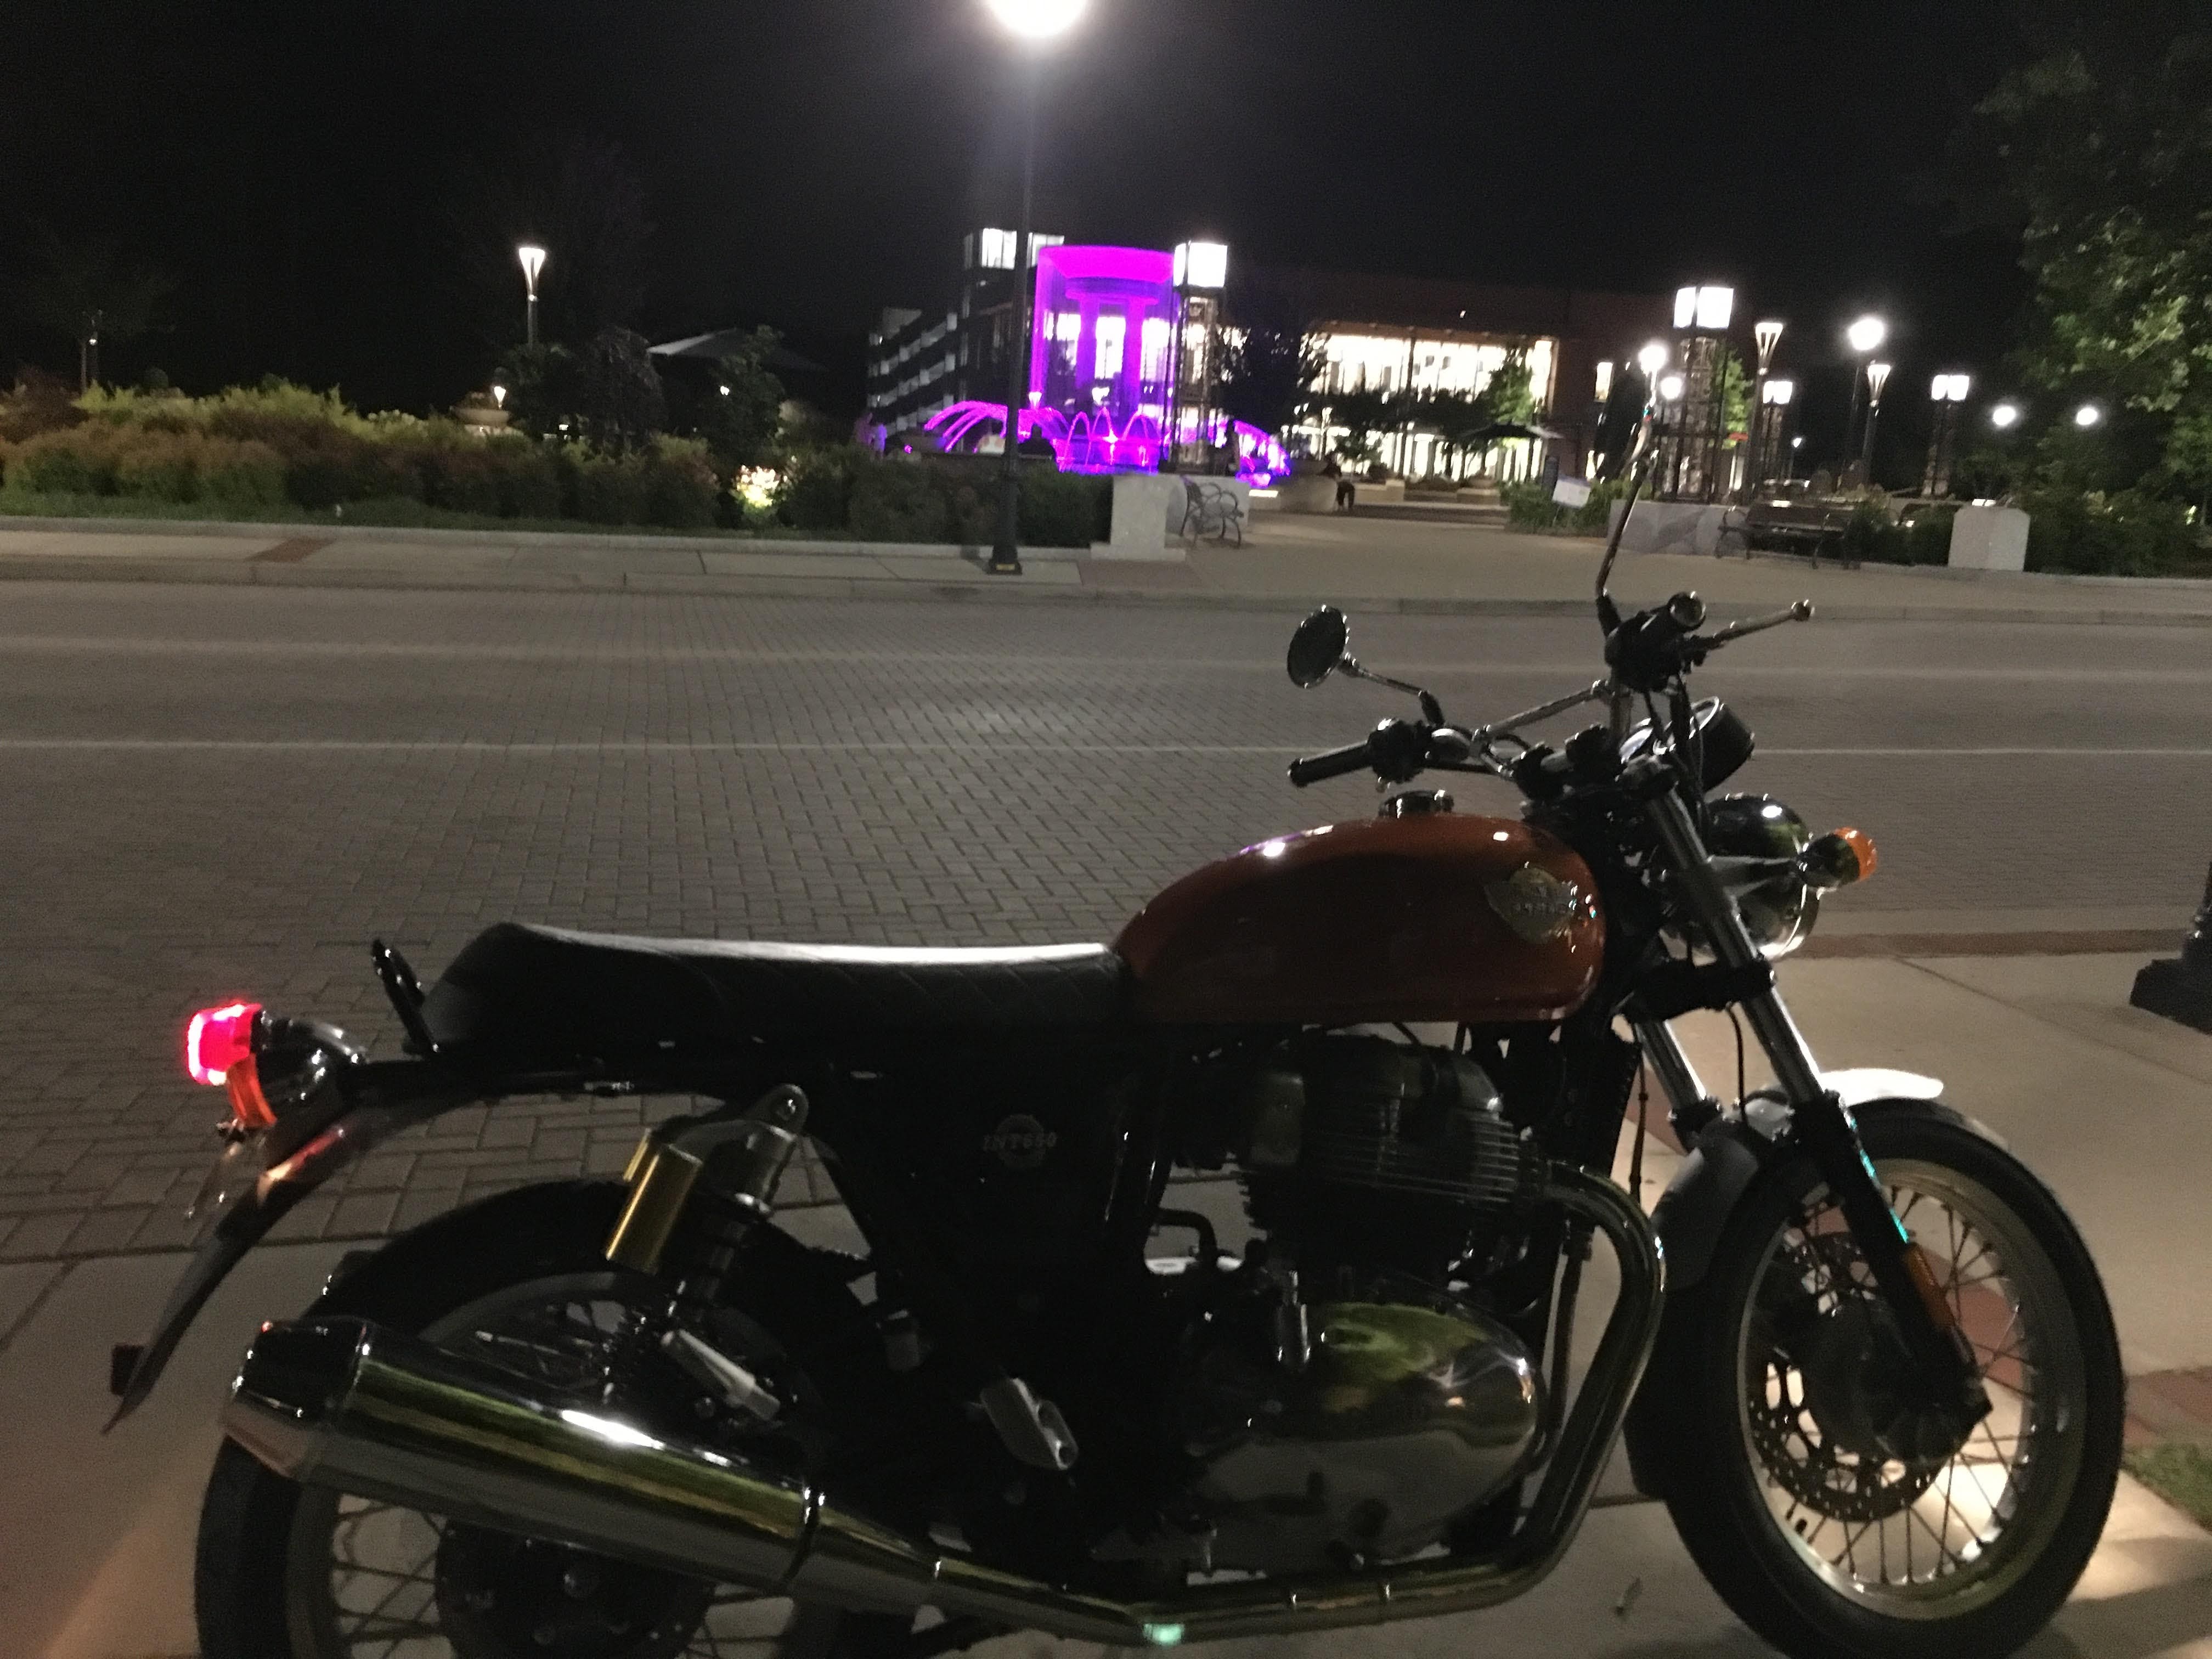
In NC, I wanted to ride the back country highways and western mountains and lean into the turns. I wanted to bop around, in Raleigh or Durham, visiting downtown cafes, with enough punch and nimbleness to extricate myself from, or all-out avoid, dangerous situations. I wanted to be able to ride up on the sidewalk somewhere, scooter-like, if warranted (which I did the other day, btw, to get some good pictures near a fountain). And I wanted to commute my 20-25 minutes to work, on the local highways, with the ability to be seen, heard, and to get out of the way of inattentive drivers.
And I ain’t gonna lie. After years of carburetion, I wanted fuel-injection. I had grown weary of donning my armor and helmet, rolling my ride out of the garage, for my morning commute, and having to wrestle with endless cranking, and fiddling with the choke, to get my bike started. The general wisdom is “Don’t take your motorcycle if you’re in a hurry”, so I’d occasionally just give up, sweatily discarding my armor and wheeling ole Roadie back into its berth, and hopping in my car.
I also figured anti-lock breaks (ABS) would be cool. YouTubers and various biker vlogs seem to dig it, and I wanted in.
And finally, being an amateur wrencher, I wanted a simple bike to tinker upon. The Roadstar, with its accessible…everything (wiring, mechanics)…was a dream to maintain. I didn’t want a bike with a lot of plastic that I’d have to remove to get at the most basic components.
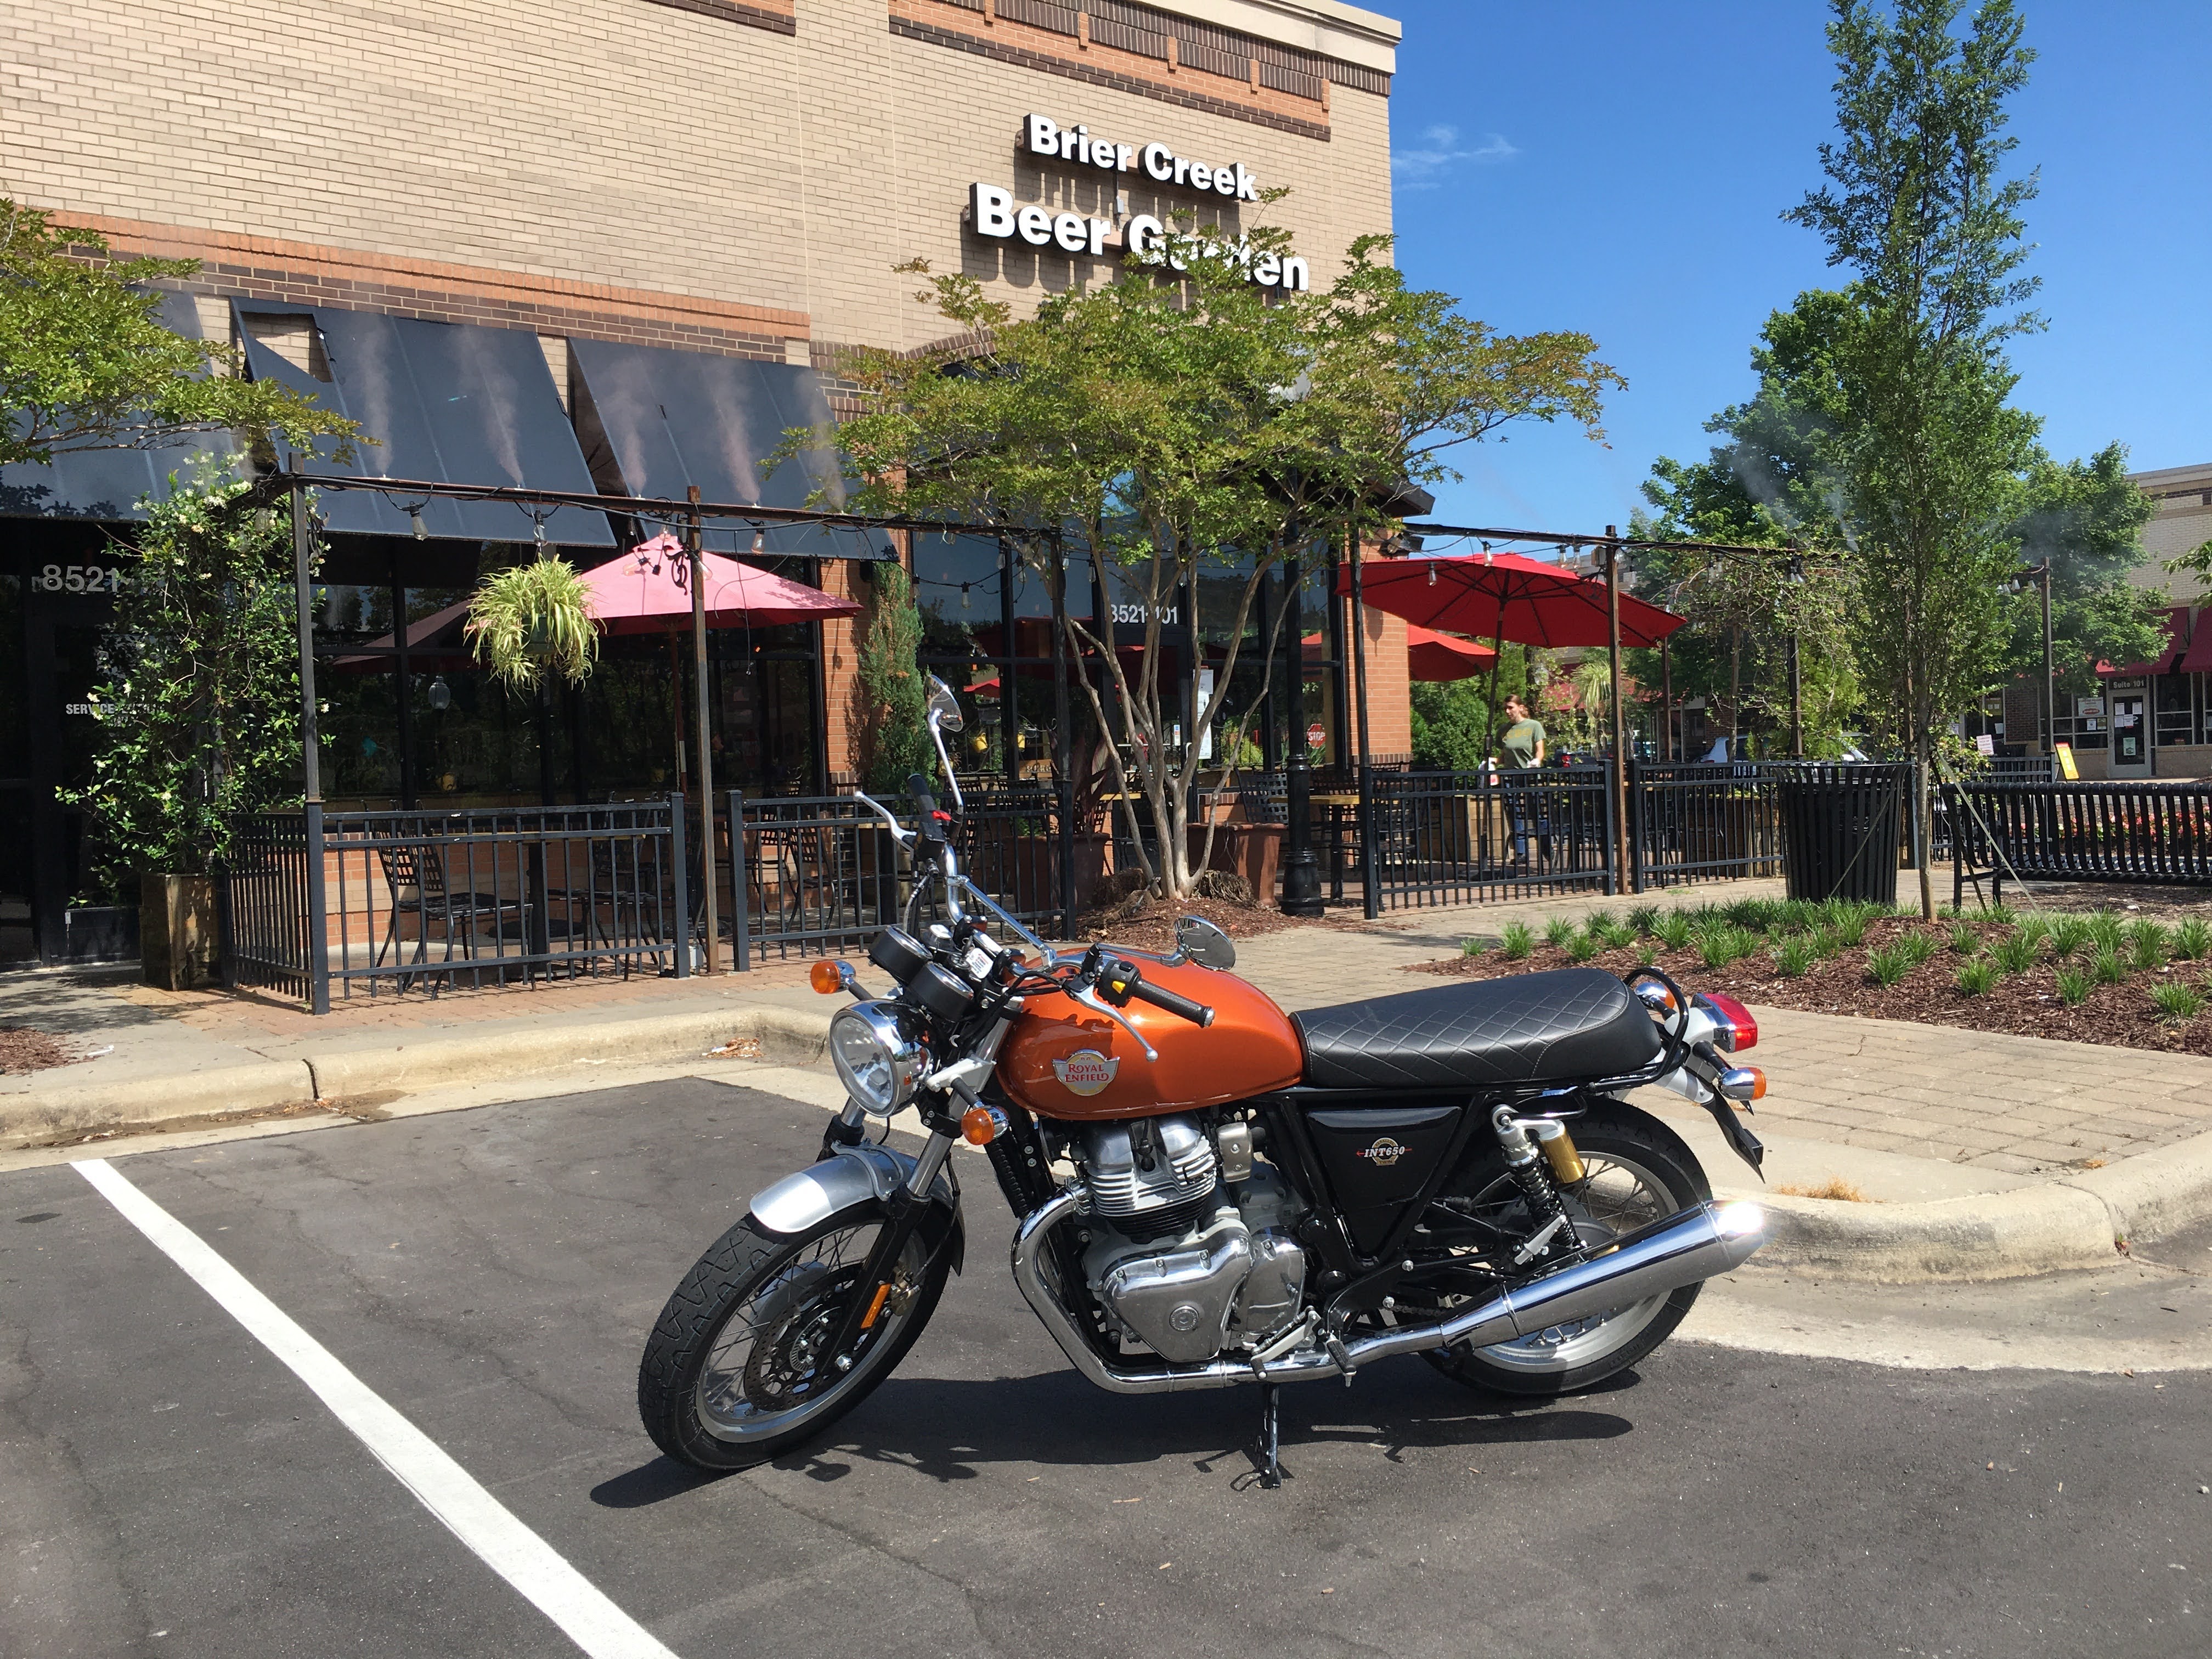
After a year of research, I picked the Royal-Enfield Interceptor 650. Old-style English motorbikes, of the 60’s and 70’s always intrigued me. I have a couple of Triumph aficionado friends who swear by them, and I respect their opinions. The old Royal-Enfield’s got me going. The classic looks. The parallel twin engines. The vibe, man. The vibe. So when I heard that they had released a redesigned product line (Interceptor, GT, and Himalayan), I started watching for my opening, and saving my pennies, and the rest is…you got it.
Summary
There are various small price point differences available regarding colors and options.
As a life-long, experienced rider, I really enjoy this bike, but it would also make a great first bike, for someone fresh out of motorcycle safety course, who learned on a 250cc trainer. It handles like a 350cc but with more power. It stays under a person and goes where one tells it to go. It is not trying to rip one’s arms off or pop a wheelie when the light turns green when one is not expecting it when one might be fast on the throttle. Not once have I felt like I was going to cross the line on a curve. Note that I’m an experienced rider and I understand that bigger bikes buck and fight around curves. You remember your physics; the bigger the mass, the more inertia in the tangent…yeah. There is no substitute for experience and training for handling your ride! This machine falls into the ‘A properly trained beginner could handle it’ category.
$5,799 for the stock Orange Crush, which is my current favorite color scheme, and the bike I bought. I managed to get the last one available on the east coast. The factory had just recently gone out of stock. Other color schemes might run a couple of hundred bucks more. Honestly, I dig most of them, but the Orange Crush jumped out at me. [My next favorite is Ravishing Red]. My favorite bicycle when I was a kid was my Orange Crate, so it kind of brings it full circle for me, nostalgia wise.
Bonus: A big shout-out to Team Power Sports (TPS) Raleigh! Sev helped me out, online, and the two times I visited the shop, prior to purchase, the staff were all willing to chat and answer questions. Sev went above and beyond to find me a bike, here on the east coast, and get it to their dealership the very next day. And frankly, this wasn’t the world’s largest sale. I felt like a grade A customer even though I was buying essentially an entry-level bike.
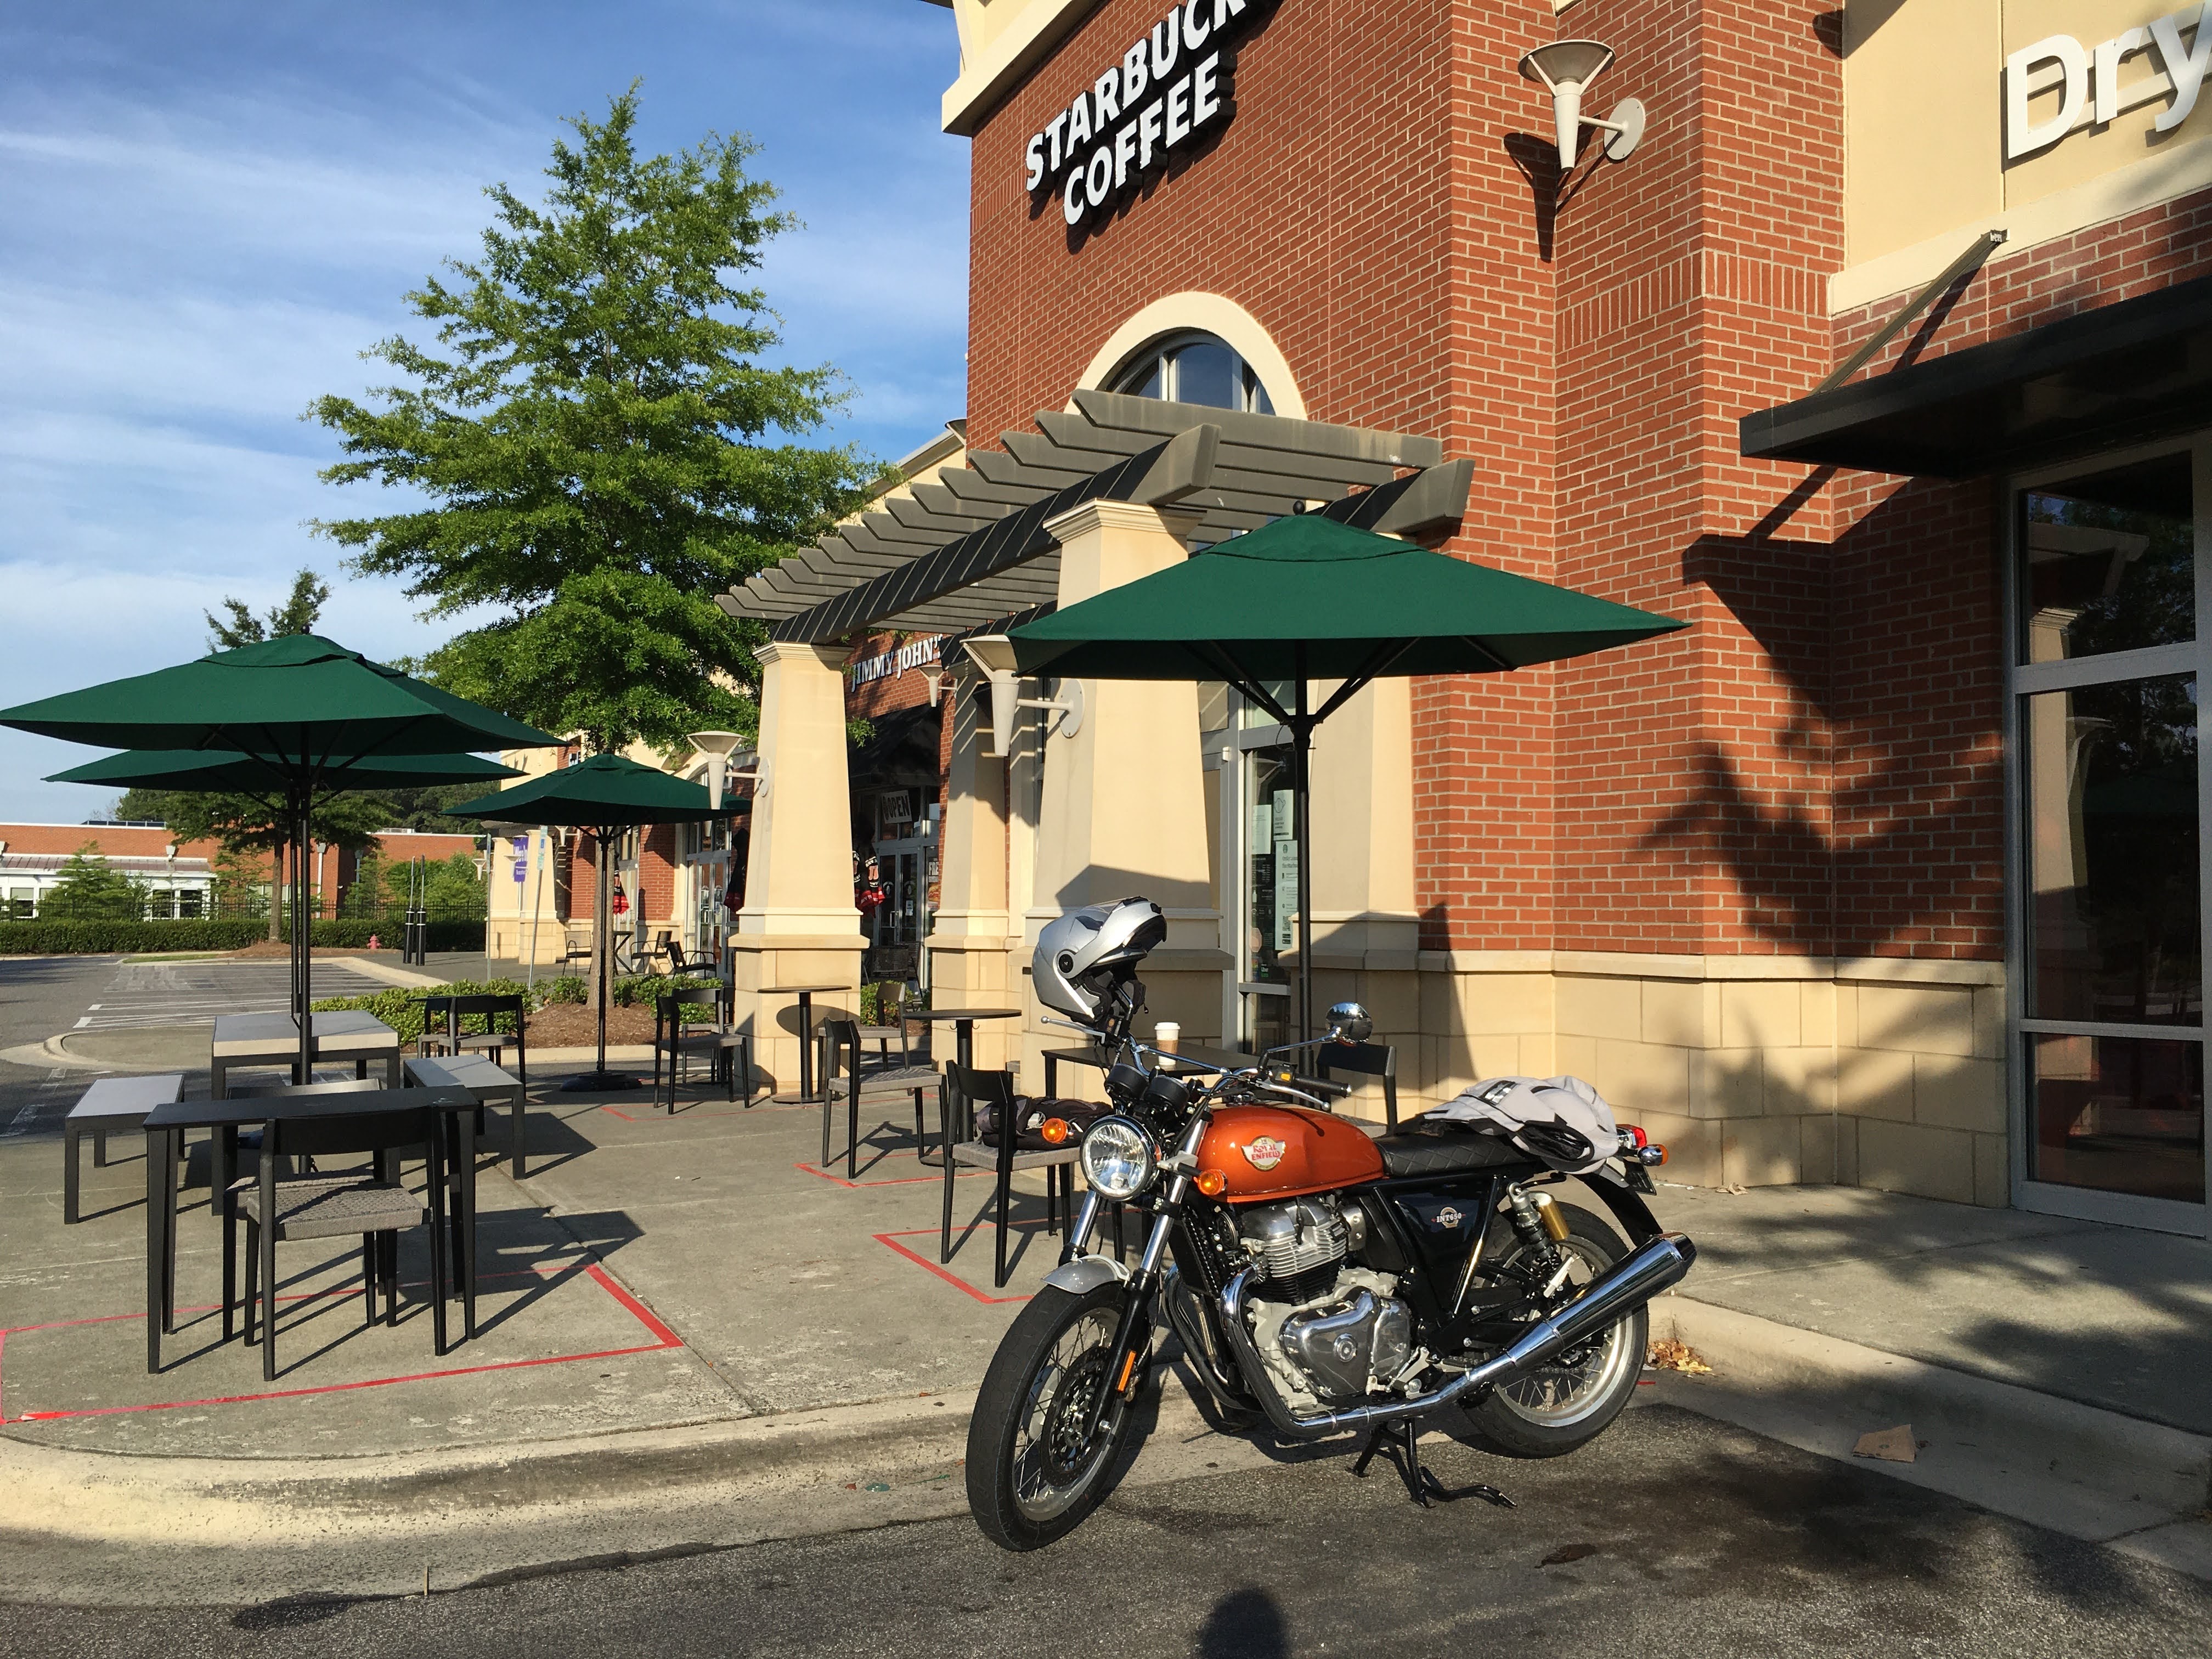
As seen at my dealership, here in Raleigh, NC, TPS (Team Powersports Raleigh, check out this link.
The other models of the same bike, again as seen through TPS’ site, can be seen at this link.
Official Royal-Enfield International Site found here.
Text Reviews
MC News – In depth overview and nicely done. Find it at this link.
Specs
Specs at bikedekho (not that in depth but okay)
Specifications from ziwheels.com
The Vids
My favorite Royal-Enfield Interceptor Related Vids
Stuart Fillingham seems to loves the eff out of it.
- See his fascinating “Royal Enfield Interceptor 650, Longterm report, why aren’t Triumphs made this way?”
- Also, see his well thought out and conveyed, “The Royal Enfield Interceptor 650 is a RUST BUCKET! FACT or FICTION?” (Spoiler: Debunked!)
Motorcycle Monkey (Quick review): “Royal Enfield INT 650. EASY ON YOUR POCKET BOOK AND EASY TO RIDE!!!”
Jay Leno’s Garage – The video that introduced the bike to me over a year before I bought it, ultimately leading to my purchase, I suppose: “2019 Royal Enfield Motorcycle – Jay Leno’s Garage”
FortNine – My absolute favorite motorcycle YouTuber, who produces excellent documentary-style vids and in-depth vids, professionally shot this one is about the Continental GT, which is the cafe racer version of this bike. The only difference is the lean-forward seating position, the peg position, and the seat, for the most part. This video is great because he dives into Royal-Enfield history a bit:“Royal Enfield Continental GT 650 Review”
TIP: Watch his “How Harley-Davidson Killed Itself” vid, which is less about motorcycles and more about how a company doesn’t understand the market/s around itself, and slowly fizzles and dies, and how government subsidies prop up companies that don’t deserve it. Brilliant.
Other Vids
I’ve watched dozens of hours of YouTube videos related to Royal-Enfields. Many of these would also be considered “favorites”, but because I designed these notes, more of as a potential buyer’s guide, I am keeping the above ‘The Vids” section skinny.
Here are some other ones I’ve deemed worthy: My Royal-Enfield Playlist (YouTube)
Journal Log
This section contains my thoughts about the bike’s performance, my purchasing experience, etc.. Basically a journal. Hey! I’ll call it one.
2021-05-01
I’ve had my tail bag, for a month, but forgot to post pics. Here they are.


2021-03-25
I ordered a pair of pull-over leg armor, my first. This one matches my silver armor jacket, albeit a different brand. I figured well protected head and torso and feet are great, but thin, ratty jeans is kind of dumb.
Link here.

Meanwhile, my tail/fork bag is en route!

2021-03-12
After years of looking at fork bags, and hours of looking for $30 range items, I opted to throw down my remaining Christmas money and buy something handcrafted. It’s on its way from the Ukraine.
It should hold a water bottle, some tools, and maybe my emergency starter. I don’t know if I’ll mount it on the fork or behind the seat. I may end up switching it up. Dunno. I’m stoked though.
I’m not a rhinestone and studs kind of guy, but I’m trying to break out of my comfort zone. And frankly, after looking at dozens of such bags, this is the highest quality I could find (very high), and methinks it’s going to look dope on my retro ride.

2021-03-06
This past christmas my wife bought me these side bags that I’d had on my bike retro-accessories list. A few weeks ago, I mounted them, near the rear of the bike, but they just didn’t look right to me.

As shown above, the rear-right looked okay (not great), and the straps flopped around on the pipes, a recipe for obnoxious melt marks.
Shown below, the rear-left was even worse, as the center-stand lift-handle prevented proper mounting, exiling the bag to the bike’s left butt cheek.

I moved them to the side panels and I think they look great.


They each hold the equivalent of a small to mid-size purse, plenty of volume for extra gloves, masks, bungie cords, a tire gauge, and hand sanitizer. I was surprised to find they held more than I thought they would. Empty they look small, but they open up quite nicely.
I was also surprised to find they do not hinder riding. They occasionally brush the back of my thigh, but my position is such that they reside in the V between thigh and shin. Even at a stop they do not get in the way, and I’m 5 foot 11″. Perhaps riders of smaller stature might have issues.
To protect my side panels, from the metal buckles, I wrapped the buckles in shipping tape, in typical biker git-er-done style (or lack thereof). I was going to use Gorilla tape, but I was not sure whether I’d like the placement, so I wanted something less permanent. I’ll keep this tape until it starts to fail, then switch to Gorilla.

2020-07-25
It’s another hot one in the triangle this weekend, in the low to mid nineties with >70% humidity, so I resolved to get into the garage this fine Saturday morning and wire my phone charger into my ignition circuit first thing. Instead, I dinked around, watched some YouTube, and had coffee with my wife. I was in the garage by 10:30 AM, after a shower. The heat was already oppressive, but my garage door faces north, so the bike and I were shaded, and there was enough of a calm breeze to keep the air moving. The key to being productive in this heat is small, conservative movements.
At first I thought I’d re-watch one of the heat-shrink vids again, but I shook myself, chuckled, chastising myself for over-thinking it, and decided just to dive in.
The project was simple in concept: Wire in my phone charger, to the ignition circuit, using the factory accessory plug mounted behind the headlamp. To do that, I would need to snip off the non-standard [to me] yellow connector, splice in a quick-connect connector, and wire another quick-connector to the phone charger’s cable. For the splicing I would use heat-shrink butt-connectors, the old school kind that require crimping and shrinking, versus the new kind that have low-temperature weld bands and thus do not require crimping. I opted for the old kind because they were in stock at Advanced Auto Parts (store). In hindsight, I am thinking I made the right choice, because crimping allowed the wires to maintain a reasonable purchase so I could position the rig for the heat gun, especially for the set behind the headlamp, where the lack of three hands would have been problematic. I do look forward to my next wiring project so I can try the low temperature welds where I can more easily position the wiring, such as on my workbench.
I laid out my tools and then grabbed the quick-connect extension (photo of uncut unit available in the phone mount section farther down this page), snipping the wires at its midway point. I then had two equivalent pieces that were guaranteed to fit together.

I then stripped the non-connector ends, in preparation to feed them into the butt-sleeves. I also did the same for both the charger’s wires and the aux port wires.


I crimped a quick-connect rig onto the phone charger, matching the charger’s wire colors with those of the quick-connect rig.

Next up, I connected a quick-connect to the bike’s aux port, assuming the red wire to be positive (it was). I then mounted the phone mount/charger, back on the bike and threaded the wiring through the back of the headlamp. Using the convenient harness bracket (seen below as the bent metal bracket clicked into the right-most bolt), I wound the new wiring harness out of the way enough to allow the convex headlamp assembly to fit nicely into its concave space.


My wife snapped a video of the heat gun process, behind the headlamp, so I will post a link to that if I get around to it. I am very happy with how the heat gun performed melting the butt connectors.
Needless to say, everything worked (else you would have wasted your time reading this far). The ignition switch turns the charger on and off as I had expected.
For $3 US, for the quick-connect cable, and another $2.50 or whatever, for the butt-connectors, this project is a no-brainer. Granted, I didn’t own a heat gun, so I bought one, but I could have used a torch (dangerous in such close quarters behind the headlamp), or a grill lighter (soot anyone?), but I don’t count that as a real cost in this project, because it’s a tool, and a guy’s gotta have his tools, right?! I should have already owned a heat gun, and my shame is now partially erased, having now acquired one.
Charger Update: 2023-04-02
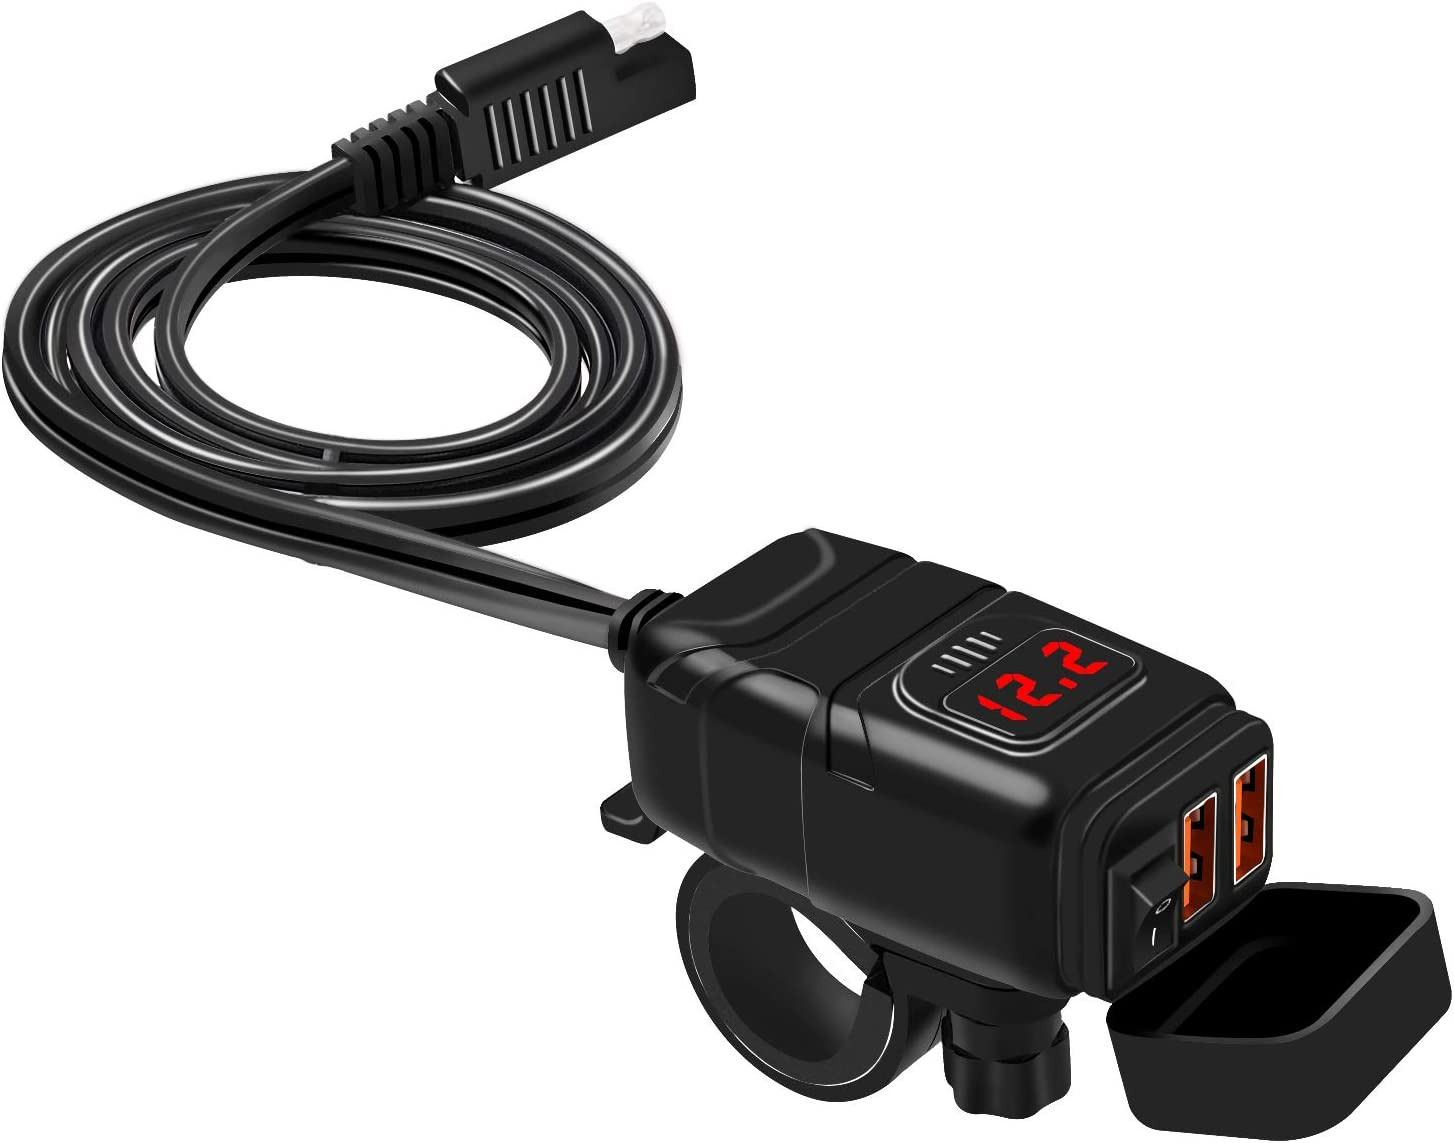
I bought a Royal-Enfield Himalayan a couple weeks ago and it came with an aftermarket USB charger. I found the same one online and bought it for my Interceptor. The unit has a quick release connector that should match the one I installed in the Interceptor’s ignition circuit/accessory port so I won’t have to worry about turning the charger on and off at its included switch; I’ll let the ignition do the work.
Amazon item: https://www.amazon.com/gp/product/B08RYJ8QK2/ref=ppx_yo_dt_b_asin_title_o00_s00?ie=UTF8&psc=1
I am getting rid of my existing Interceptor’s phone mount to replace it with the same Quad-Lock knock-off I installed on the Himalayan: https://www.amazon.com/dp/B09MD4J554?psc=1&ref=ppx_yo2ov_dt_b_product_details

In this way I’ll have both bikes using the exact same phone mount/charger setups, with the exception that the Himalayan’s USB charger is connected directly to the battery. I will look into changing that to the ignition circuit in the future. But for now, I will use the practice of using the USB charger’s power button so I do not accidentally drain the Himalayan’s battery. I mean, in principle the charger should cease drawing energy if the draw is <13 AMPs, but I’m not about to trust that.
I plan to order a couple of Quad-Lock vibration-dampeners very soon, to save my phone’s springs.
2020-07-19
I purchased my first heat gun (click here for the Amazon link). It arrived last night when the outside temperature was a balmy 92 degrees, so I will wait for a bit cooler weather prior to installing the heretofore mentioned ‘simple connector’ (found below in the phone mount section), behind my headlamp, and onto my phone charger.
I am both excited and hoping I will not melt my fingers to nubs. YouTube has prepared me. I’ve got this.
2020-07-12
Third weekend in and my assessment is the same, mostly. Still loving the ride.
I took the bike to work this past Friday (Jul-10), my first time returning there since March, in this time of COVID-19. I admit to feeling pretty cool leaning into the turn to enter the parking lot. I only spent a half day there, and when I left I enjoyed the abeit light commuter traffic, on in-town highways.
Wind Sheer Update – Life at 70+ Miles Per Hour
I have been doing a bit of 70+ MPH highway riding, to hop from one scenic back-road route to the next. It holds its own, at 70-75 MPH, but at that upper end it is not asking to go faster. It is content to hang tough there. I made it do a bit more, and it made no complaints, but its heart wasn’t in it, especially in sixth gear. Dropping it into fifth, I found some more torque, which is good to know in case I ever need it to get me out of a jam.
It being a bit more breezy this morning, than my prior jaunts, I experienced a small amount of wind sheer, for the first time. Nothing to rip my arms off, but enough to remind me to pay attention. For you new readers: my last bike was a 2006 Yamaha Roadstar 1700 Silverado, so I am used to feeling like I’m riding a floating La-Z-Boy recliner, at 80 MPH. As such, my being impressed by the smoothness of this 650, at speed, comes from the perspective of a down-sizer. My memories of my ’83 Honda 550cc Nighthawk, buffeting me and jumping around all over the place, are decades old, but I feel like the Royal-Enfield is a more well-balanced bike.
Phone Mount/Charger Purchased – Auxiliary Power Port Discovered Behind Headlamp
I purchased a phone mount/charger, and upon removing the headlight, to see if I could tap into its ignition-controlled circuit, I discovered that, aside from the left-side accessory connector port, there exists a behind-the-headlight aux port too. It isn’t documented, in the owner’s manual (unless it is represented in the included highly detailed electrical schematics, which I do not read well), but I’ve found several references to it on YouTube and a couple of Royal-Enfield sites. It’s a simple 2-pole, yellow connector, but I could not find its like anywhere, at home stores, hardware stores, and automotive stores.
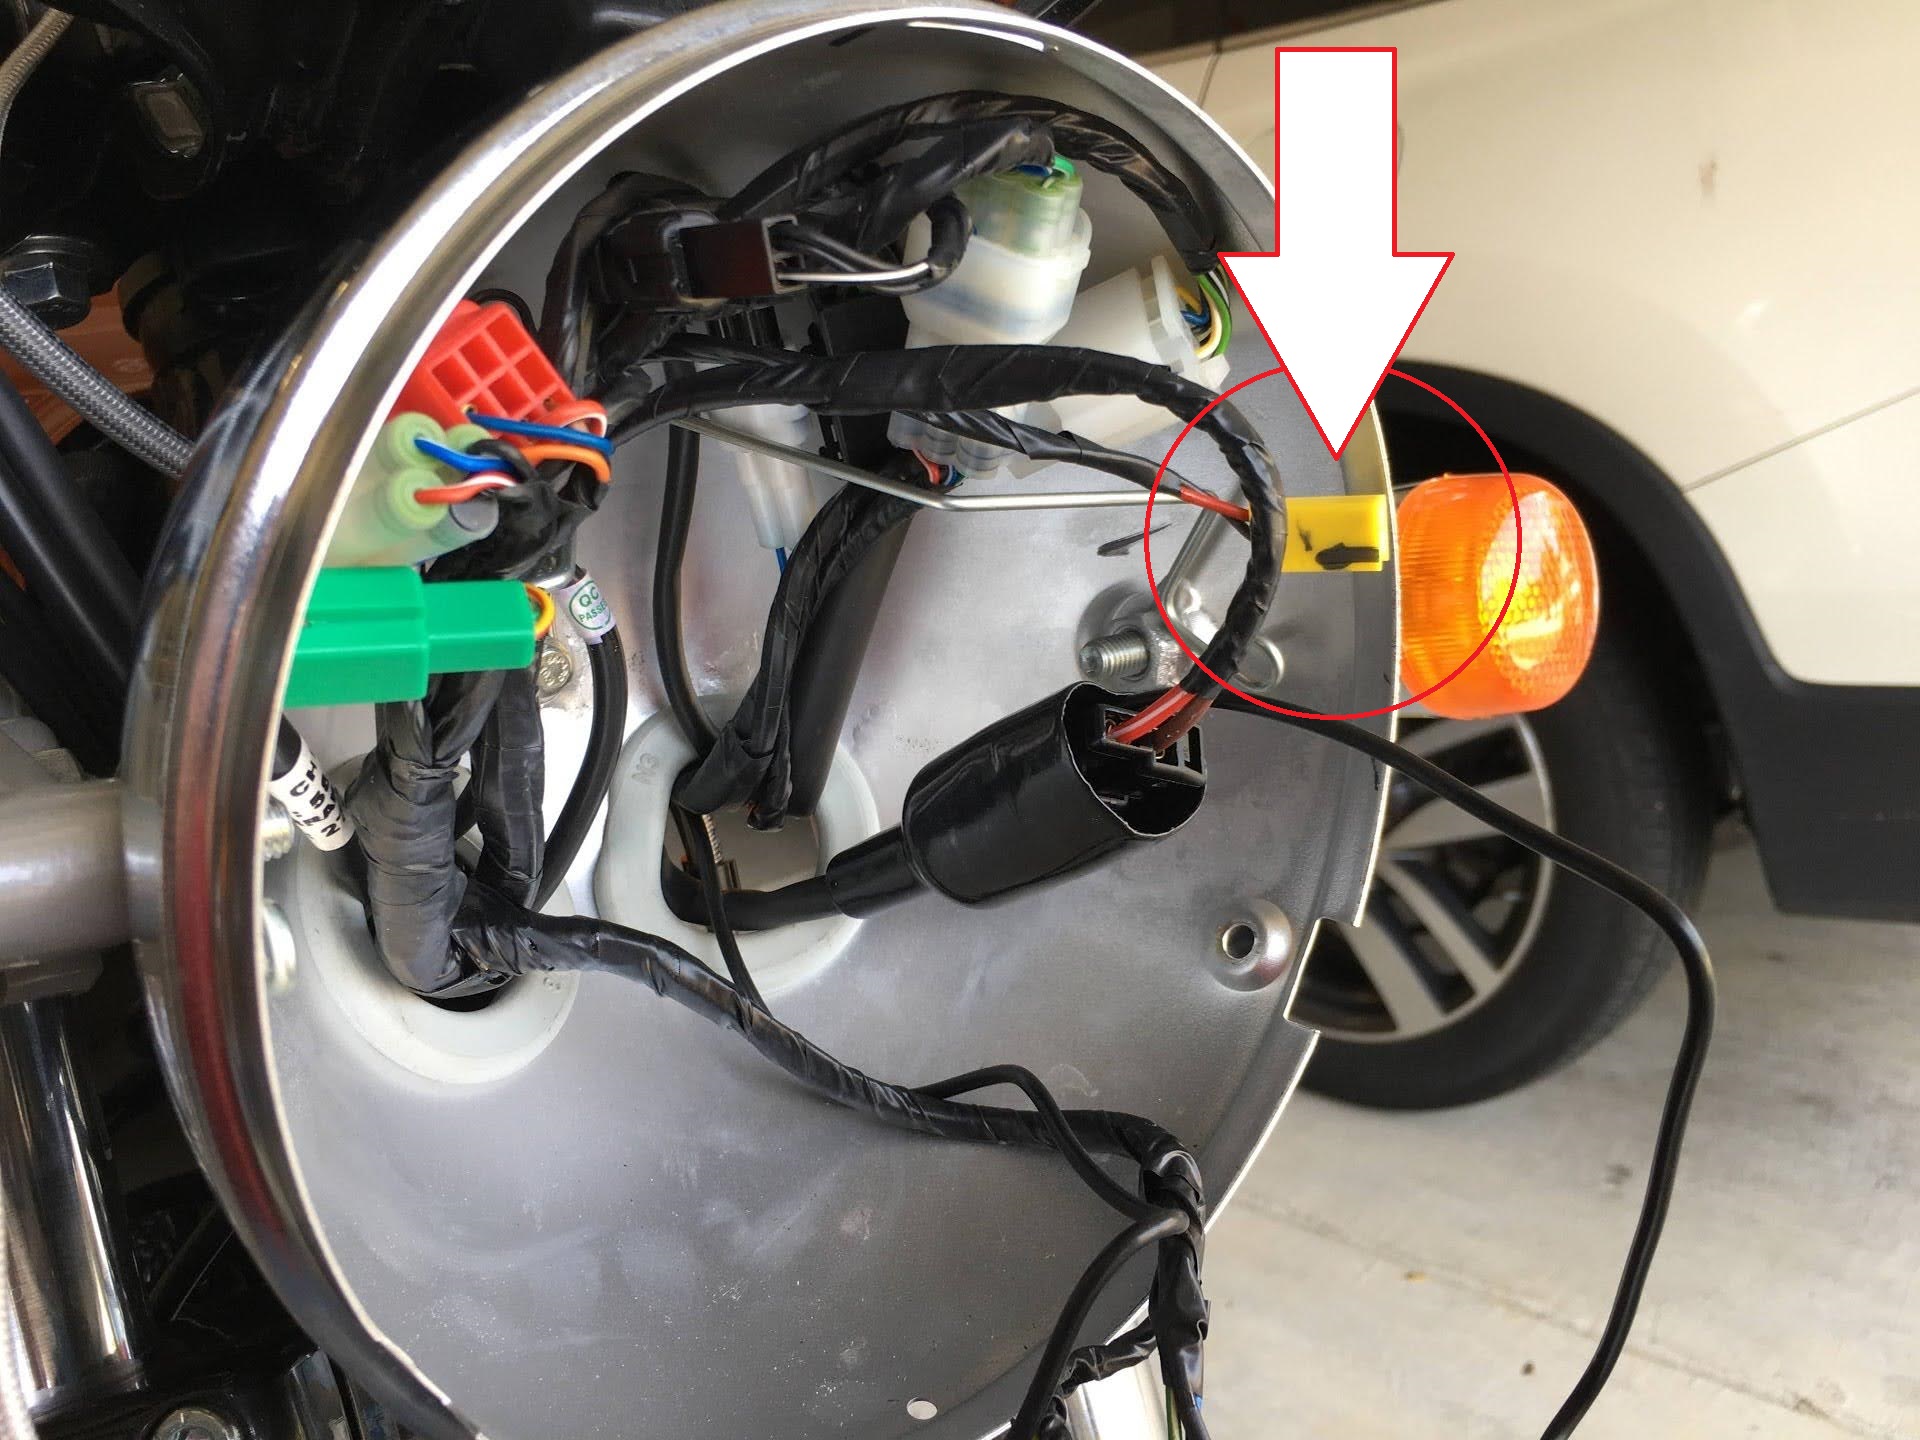
So, instead of just snipping off the port and using its wires to directly connect my phone charger, I purchased a simple connector (shown below), which I will sever in half, then I will clip off the behind-headlight aux port, wire in one half of this connector (shown below), and then do the same to the end of my phone charger. Easy peasy. [Update: Wiring job completed! Check out this linked journal entry for details and pics.] I feel a bit like a quitter on that one, giving up on finding the exact match for the existing connector, but since so many items ship, with this same 2-pole connector, I feel I am adding true value, and for just $3. Plus, down the track, when my charger inevitably dies, I can just plug in a new one without having to re-wire anything.
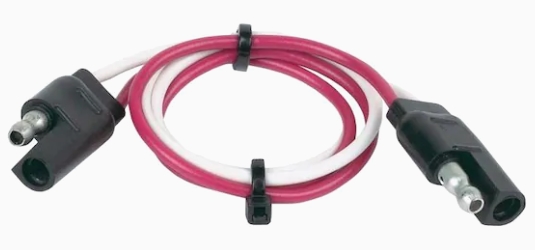
It’s a bit odd that Royal-Enfield included the the quick-connect, on the bike’s left-side (near thigh) port but the odder, clumsier yellow connector behind the head lamp. I can only assume the thought was that anything connected behind the lamp would be a more permanent device not requiring a “quick” connect/disconnect. This is not wrong. Its just unfortunate that finding its specifications is so difficult. Considering the build quality, and the nice touch of the fabric tool kit, an added touch would have been to include the matching connector, in the tool kit, to assist the rider in making use of the port.
All in all a small deal, not even worth the hassle of calling the dealer to find out what the connector’s details are. It was far quicker just to buy the standard connector and schedule a half hour to strip it and wire it to the bike and phone charger. I’ll make sure to update this blog with pics when that happens.
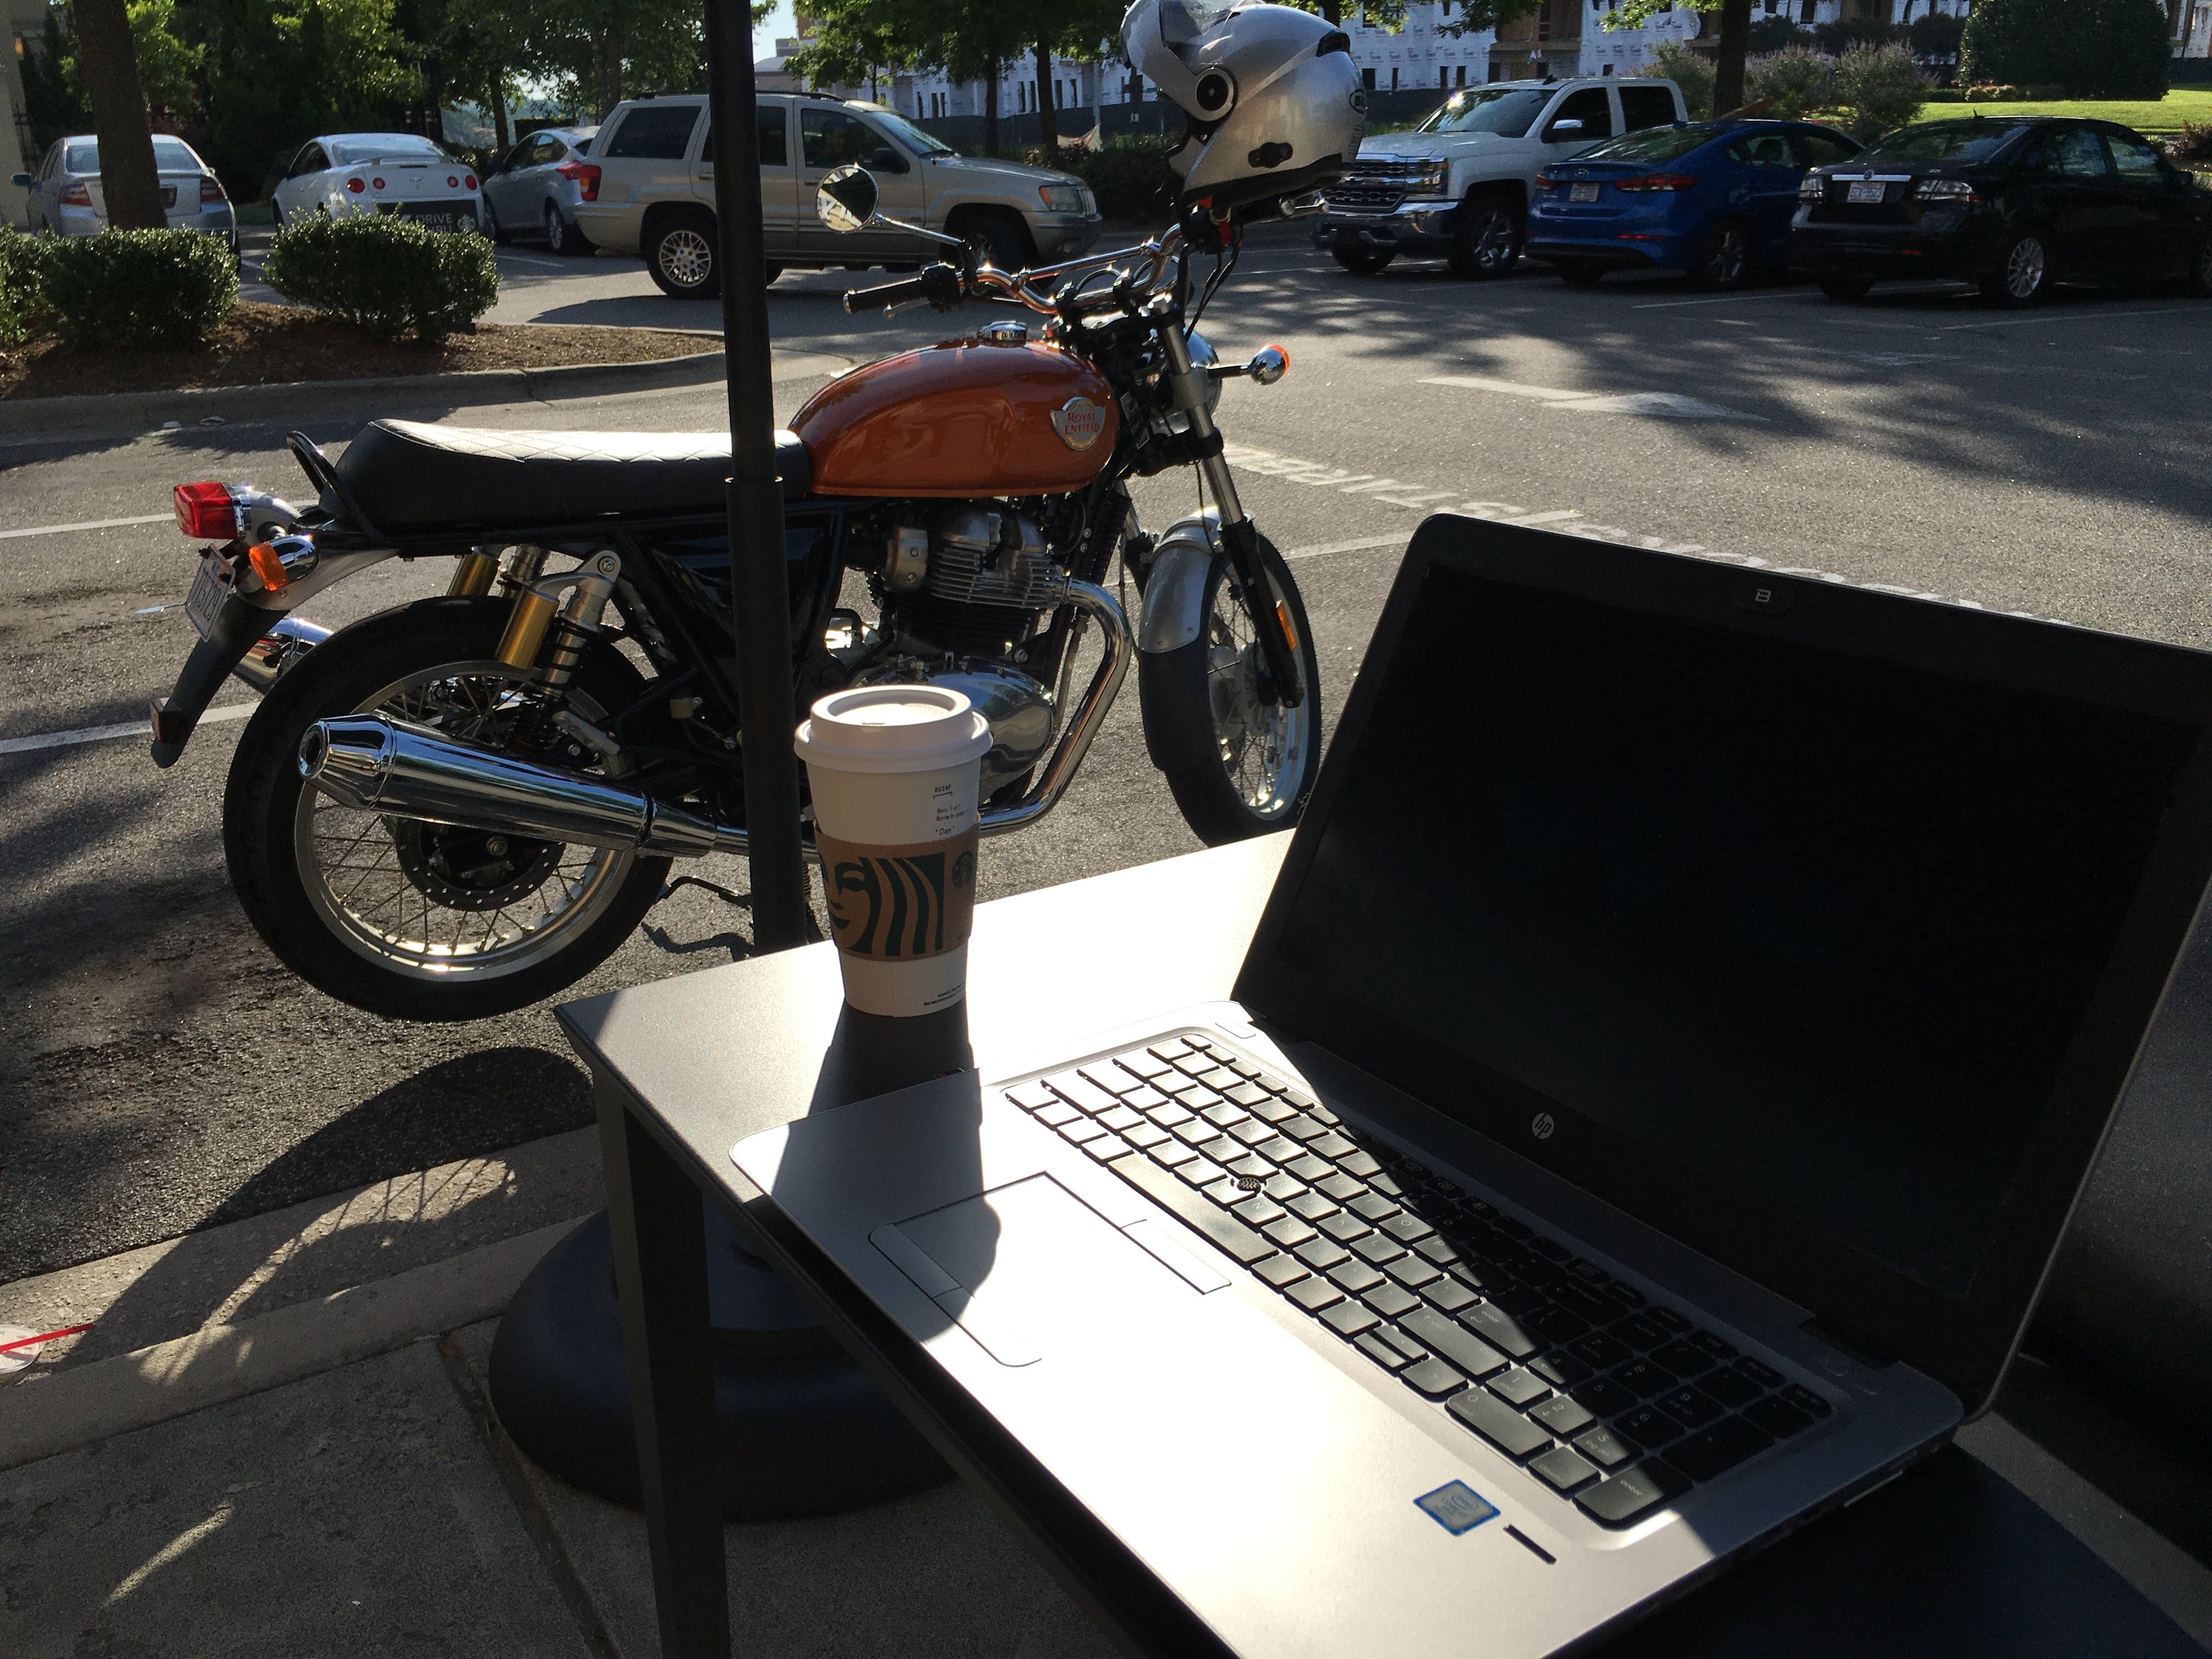
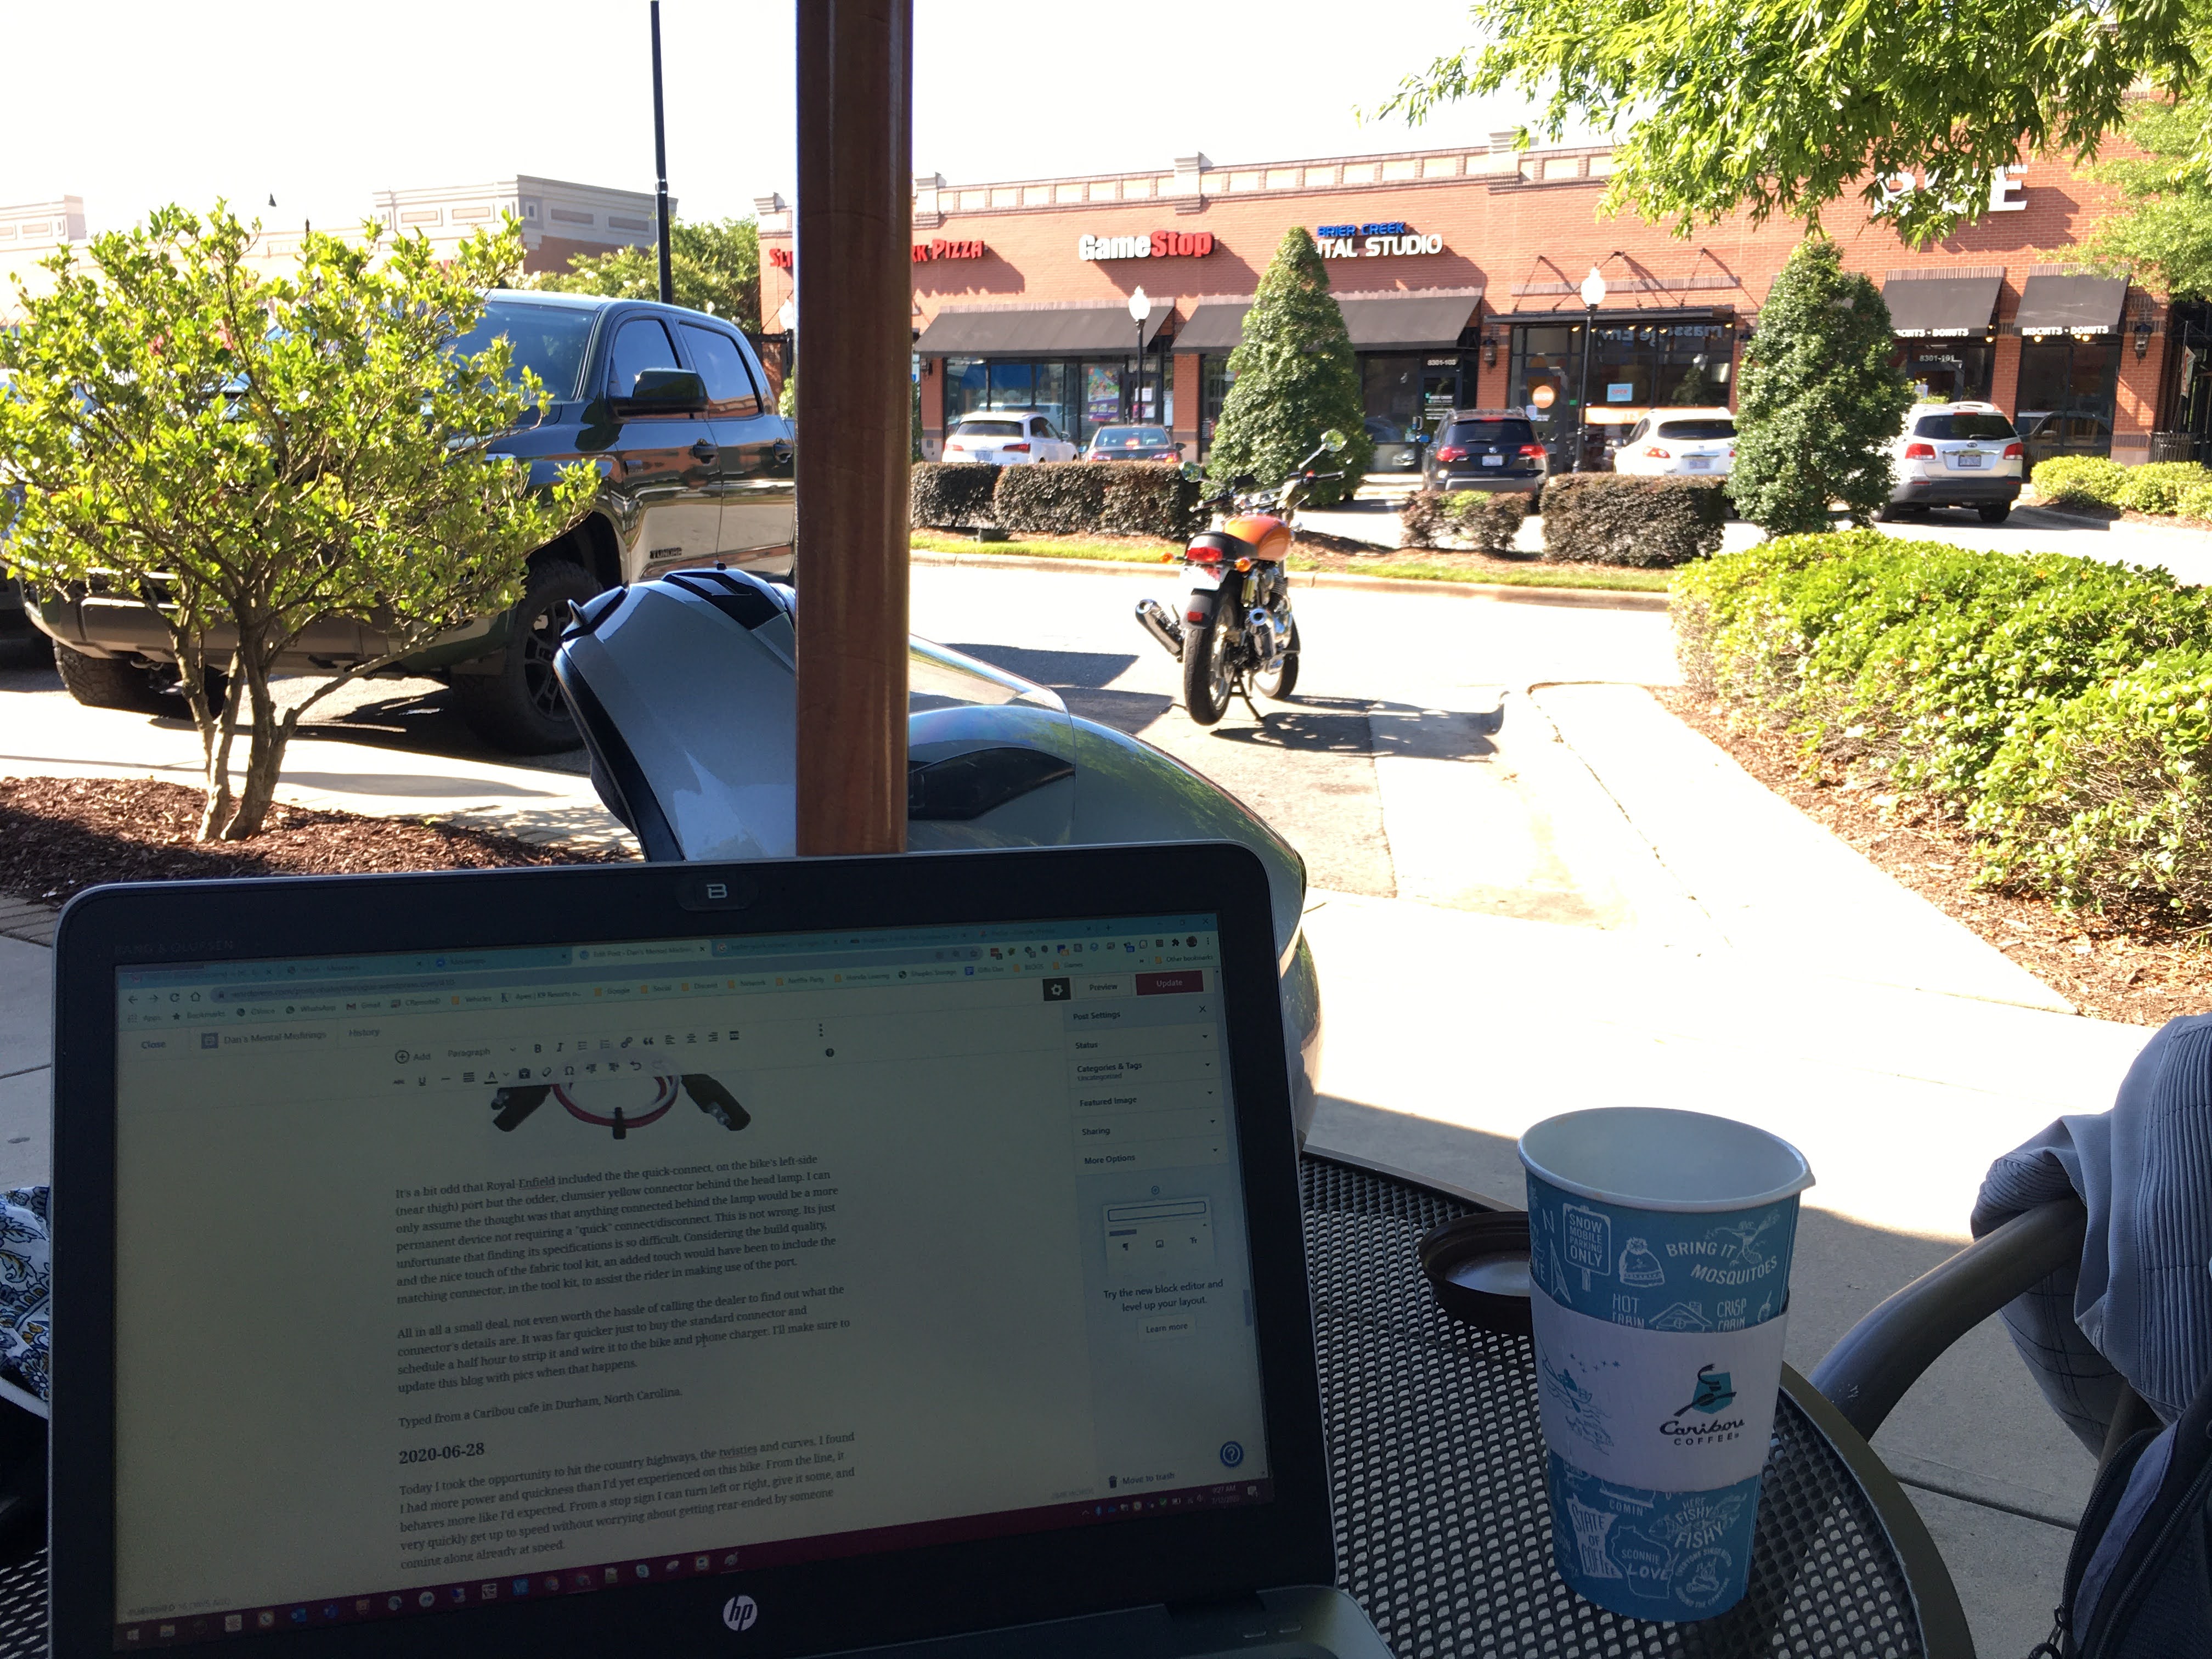
Typed from a Caribou cafe in Durham, North Carolina.
2020-06-28
Today I took the opportunity to hit the country highways, the twisties and curves. I found I had more power and quickness than I’d yet experienced on this bike. From the line, it behaves more like I’d expected. From a stop sign I can turn left or right, give it some, and very quickly get up to speed without worrying about getting rear-ended by someone coming along already at speed.
At one point I was going about 50 MPH, saw a biker up ahead, and I gave it a bit more, to see if I could catch up with them. The bike responded well and quickly found myself at “intercept” speed.
Day three verdict: Exceeding my expectations for both fun and performance.
There’s not much real need to continue this log, I think, as this about covers it, but I may add something else down the track when it occurs to me.
2020-06-27
I picked the bike up yesterday, paying for it, then dinking around at a nearby Home Depot for a couple hours until it arrived from another dealership, courtesy of the courier TPS sent.
Honestly, I was a bit taken aback at how smooth it was for a bike its size. Coming from the Yamaha Roadstar 1700, as my last bike, I guess I expected the Interceptor to feel more like my 550 Night Hawk did back in 1983. I had heard the shocks aren’t all that great on this bike, but I traveled some sketchy roads, on the way home, on purpose, and the shocks and cute little tires did a bang up job of keeping me jostle-free. That said, it’s still muscle memory for me to put me weight on the pegs, rising up a bit, just prior to going over bumps, so that may have helped.
And forget about the gearbox and the slipper clutch. Man, like butter! For a new rider, new to shifting, I imagine it’s got to be a godsend. For me it’s almost too easy, but I’ll take it.
The seat surprised me too, being very soft, although the TPS guy who lead the walk around alerted me to the fact that it would be soft. I guess I was in denial.
The pegs placement was exactly as I’d read about and seen on YouTube. A little goofy, when at a stop light, in that one has to splay out a bit. Once I develop some muscle memory I won’t even notice it, just like the rear brake seems a little low. Take it for what it is worth, as I spent the last seven years with floorboards and a pivot, heal-tow shifter, so some of this is just me getting re-used to down-is-down and up-is-up, versus down-is-up and down-is-down. Yeah. [<-That bit written 6/26]. Update: 6/27: After riding last night and a half day today, my left foot finds home base quickly, both feet find their pedals, and my stance at the stoplights feels natural now.
Once I got home I immediately took my dogs for a walk, then took an Uber back and picked up my car, and went back out for a night drive. I stuck to the city, getting some pictures in downtown Cary (obligatory fountain shot, but it was dark), and I headed out for some back country twisties.
The bike cornered too easily. What?! Let me explain: I didn’t have to lay it down or otherwise take a knee, going around curves. It just went where I wanted it to go, gripping the road. Super safe, but not what I was looking for. I may play with the tire pressure, increasing it a bit to keep the shape, and thus allow the bike to tilt over a bit more. Dunno. I feel as stable as being on a Spyder, so we’ll see if I actually do this or just leave it for now.
This morning I gook a nice, sunny ride all over the place, meeting a friend for coffee, urging him to sit on the bike and say “Vroom, vroom”, and then went around to some of my haunts from social-in-your-face days, pre-distancing. Now I’m at yet another cafe, drinking iced coffee and updating this blog.
So far so great. Some of my Facebook friends, and non-Facebook friends, are losing their minds over the pictures and video I am sending them.
2020-06-25
I ordered a motorcycle today, the Royal-Enfield Interceptor 650. If all goes well, with its shipping, it will arrive tomorrow for me to go pickup. Woooo!!!
I’ll populate this section with my thoughts on my bike after I ride it for a while.
Dan Reams is a podcaster and healthcare technology professional based in The Triangle, a North Carolina tech hub. Originally from the Madison, Wisconsin area, Dan enjoys riding motorcycles, writing, craft beers, reading Science Fiction, having meaningful conversations, and above all else, thinking through processes and tweaking them, adding spice here, thickening sauce there. Mmmm. Processes.
Find out more at
https://indeepwithdan.com
